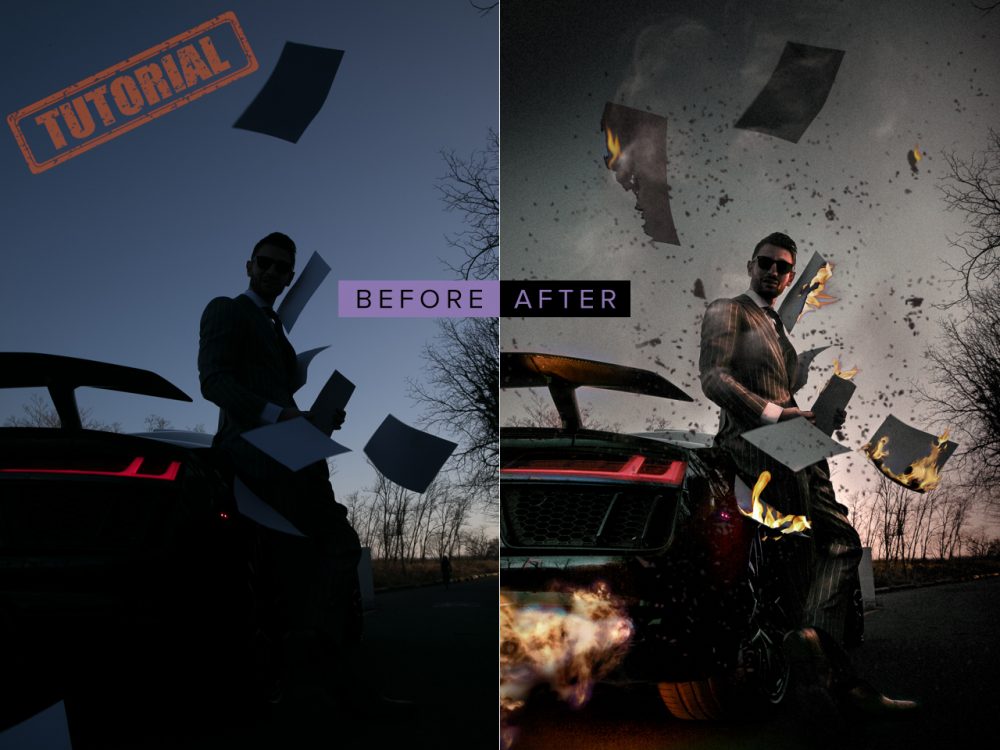
For the first time, let me unveil a detailed “before and after” Photoshop tutorial from epic fail to epic shot using my favorite tools and voicing my creative thought process.
Introduction
Last week I spent an entire day working on a photo. One single photo. Entire day. Unsurprisingly, it turned into one of my heavier-processed digital art images. Such effort shouldn’t go unknown so I posted a “before and after” in my Instagram and Facebook story. It occurred to me that although I demonstrated a few such transformations in the past, I never dissected the detailed thought process behind them. This killer shot would make a great case to unveil some tools and techniques I use to convert an epic fail to epic shot. I ran a quick poll and lo-and-behold, dozens of viewers expressed an interest in a Photoshop tutorial. Let’s dig in, then.
Concept
I recently started a collaboration with Kevin Kuznetsov, the aspiring owner of the digital development agency BreakThruWeb that helps small businesses succeed online. I’ve personally known him since he was a teenager and admire how much this immigrant from Russia has developed and achieved as an entrepreneur in his 20s. He offered help with setting up a solid website for me but I had it covered recently. He then helped me write an article I’ve been wanting for a long time, how to entertain your wedding guests with a twist.
So one day he texted me about an impromptu photo shoot involving burning paper. I happened to have another shoot in the city that day and gladly agreed to see him first.


Then he drops an “r8” into the discussion. Forgive my ignorance, had to Google it. Jaw dropped. That and burning paper? My creative gear shifted, and the concept turned into a hallucination of a flame thrusting from the exhaust pipe and bursting those papers into ashes. Would it work that way? I am not on the MythBusters scale to find out so I knew I’d need to bring in Photoshop magic—something I started doing more and more recently.
Photo Shoot
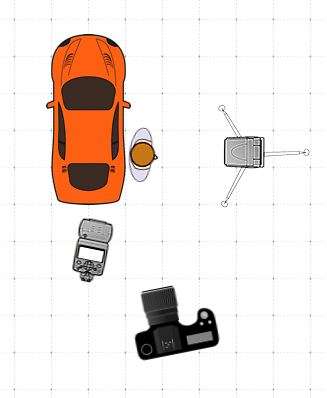
The idea was to shoot from behind the car, low angled for an almost “in your face” greater impact. I’d have Kevin lean on the car, fire a bunch of papers and throw them up. Exposing for the late afternoon sky (f18, 1/200, ISO 200), he would be underexposed, so I mounted a speedlight in front of him. Such side light would give me a dimensional drama that is so prominent in my portfolio across all genres. Because the light would fall off his upper body, a second speedlight was placed on the ground beneath the exhaust pipe. PocketWizards would trigger both.
We know we only had one shot at that, especially considering the state troopers who regularly checked on us. I suggested we practice the throw before setting anything on fire. Kevin did but most of the time the wind would mess it up. The only time papers flew perfectly my transmitter failed and flashes did not fire!
Foreseeing how even tougher it would be to direct the papers when set on fire, we dropped that idea, deciding to just hold a burning stack for the second image, shot from a different angle and position. More on that later.
So here comes the failure part of the story. After going through the photo set looking for a candidate for that killer shot, I so much wished the flashes worked on that first image! I loved everything else about it—papers, angle, pose, his sight direction, the tension! Although it meant doubling the work for me, decided to go with it and salvage it in post-production, taking an epic fail to epic shot.
Real or Fake?
To be clear, I do not practice this trickery routinely to save my butt. I do not want this article to become a pseudo-revelation for other epic images I pulled off in real life. I worked with properly triggered lights and real fire, mountains, underwater caves, jumping horses, etc. None of the images below were manipulated other than enhancing the colors and contrast:


Initial Steps
First things first, I did the initial round of adjustments to the image in Lightroom. I usually shoot in RAW format to leave myself the maximum leverage. Its uncompressed state (as in JPEG) allows for cleaner manipulation of the white balance, exposure, color toning, and curves as the main areas of fine-tuning. Here’s the original image straight from the camera, compared with the basic Lightroom adjustment. My clients know this level as “Standard processing” (I left it intentionally slightly underexposed).

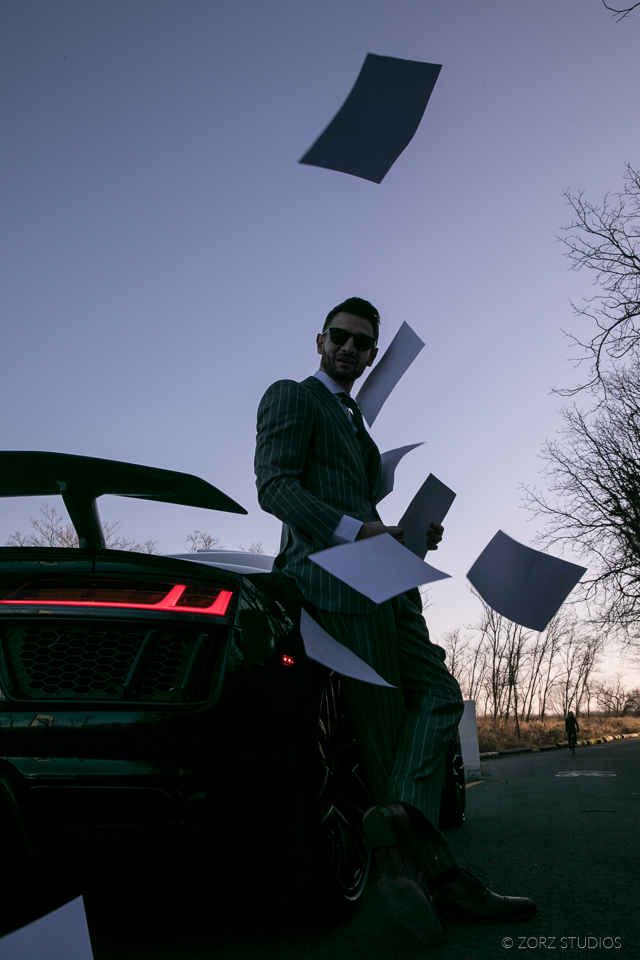
To imitate the missing flashes, I painted the would-be light into the composition. I’d also want to blend the cold speedlight with the warm light from flames. To achieve this, I created an alternative version with exposure boosted and the white balance heavily shifted to a reddish-warm tone. Then, layering that version on top in Photoshop and adding a layer mask to it, I painted in the lit areas with the brush tool. For realism, had to zoom in 1,600% to attend to smaller features, folds, and shapes.


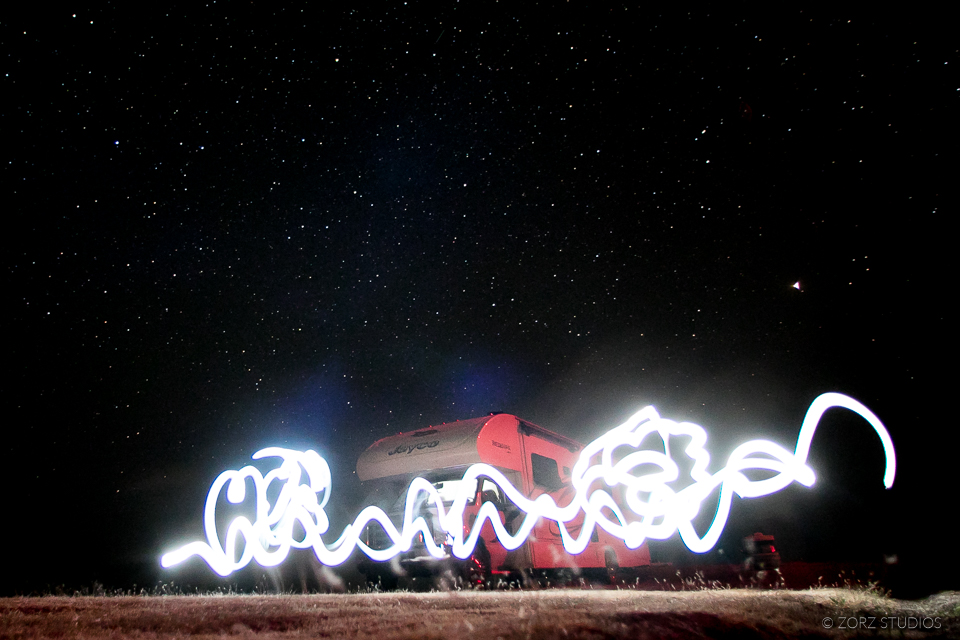
Drawing the parallels with my early days of artistry, I sometimes referred to this as “light painting”. However, the term is also used for a different technique involving dragging the shutter so a moving light leaves a trace. Here’s a playful example from our US Photo Tour in 2018:
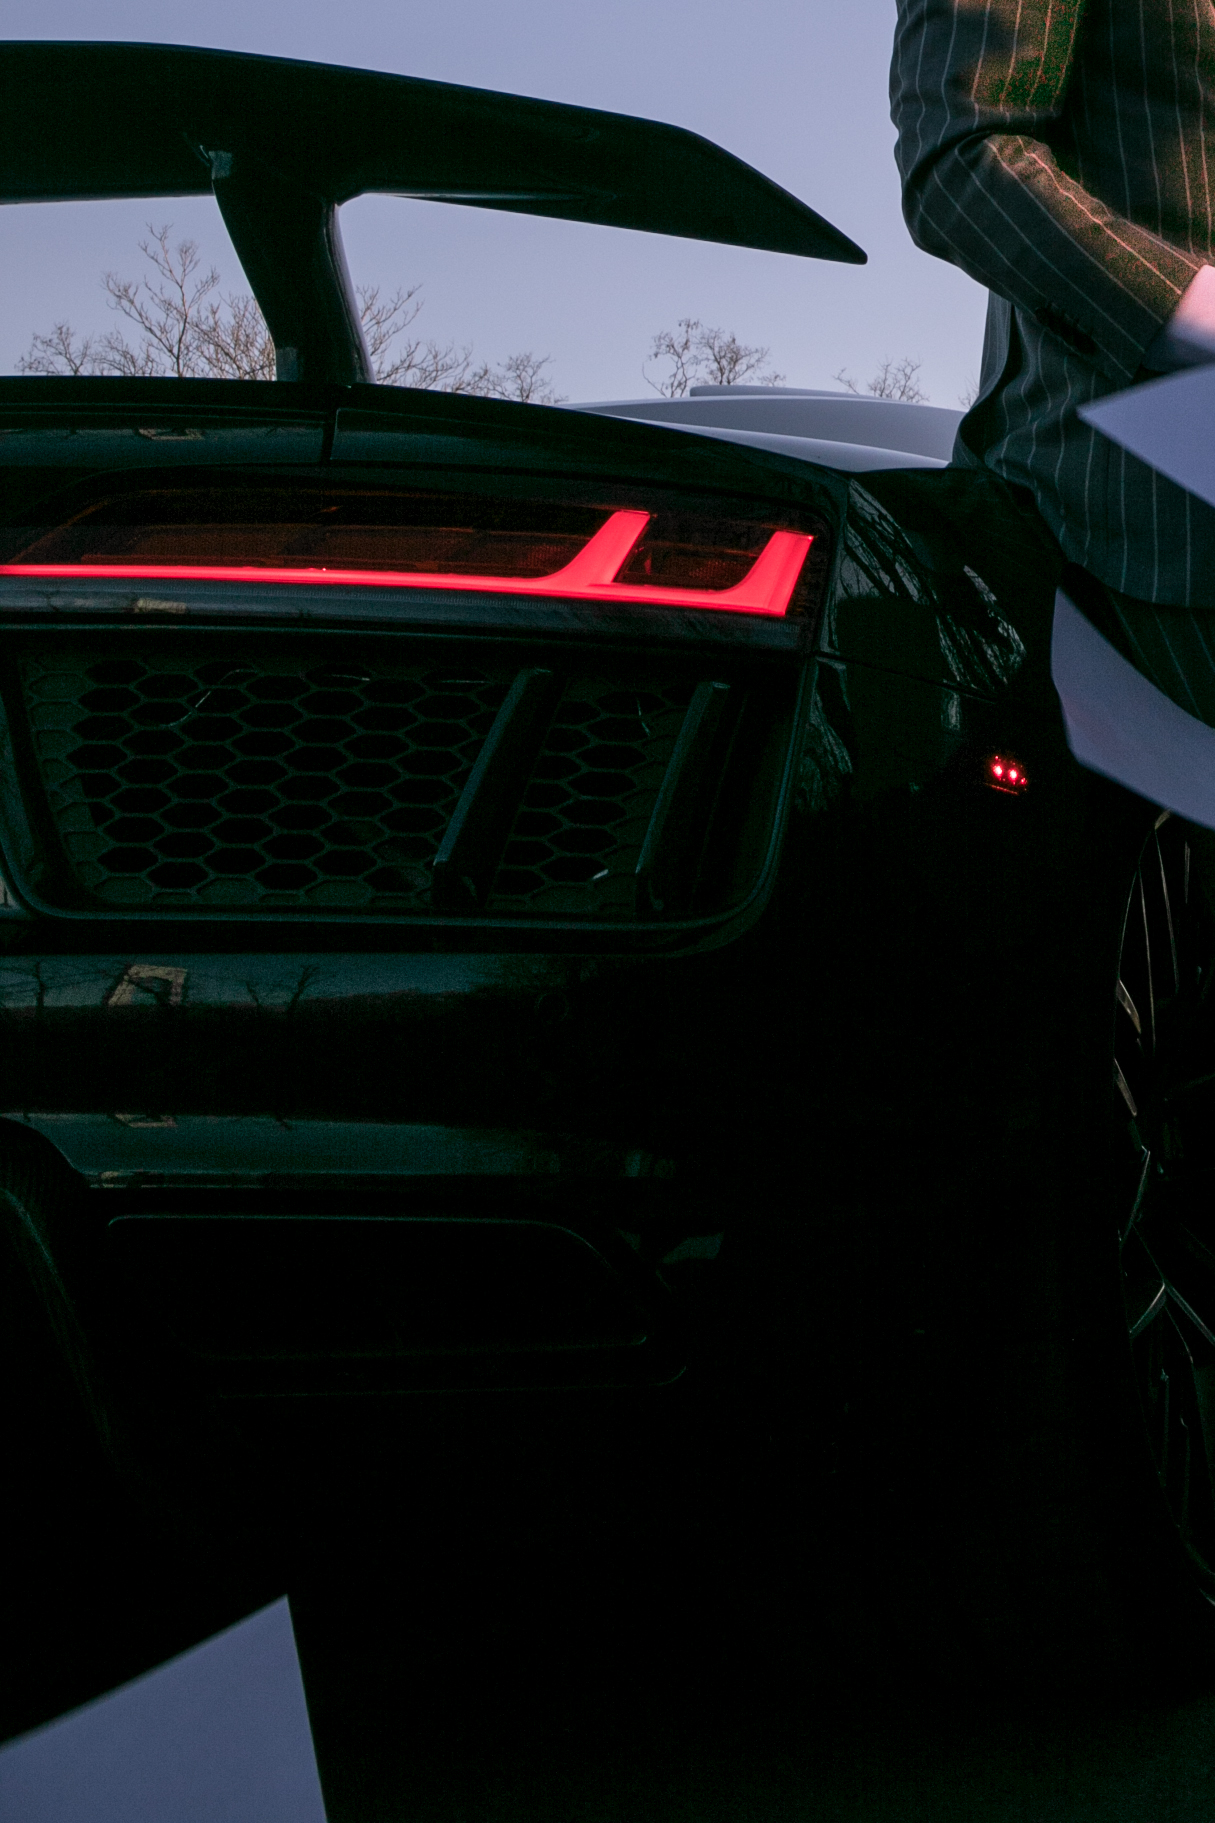
Now, let’s take care of the rear of the car. Unlike with people who move all the time, I have more leeway in merging shots of static objects. To restore the details there, I opted to juxtapose the matching portion from another shot where the ground fill flash fired. Not only did I avoid creating digital noise by just pumping up the exposure but also re-introduced a more realistic-looking lighting under the spoiler to imitate the reflection of future backfire. Details were added to the exhaust pipes and the tire. These changes are still subtle but I’ll need them as a base for a clean boosting later.

Digital Art
Next, one of the coolest parts—the backfire! I went looking for the stock photos with a similar angle and used fragments from two. Using layer masks and blending modes, I mixed and matched them:


Continuing on with the fire, I looked for more stock images of flames as standalone elements in a transparent PNG format. The format would help me add fire to papers cleanly without having to mask out any unnecessary parts. I like CleanPNG for a good collection, hassle-free downloading, and free license for personal use.
The stock flames were too bright and saturated for my target. I used Hue/Saturation adjustment layer to tone them down. For a more believable effect, I also used a conveniently named Photoshop tool Burn to darken the paper areas touched by the fire. Last, to ensure they fit perfectly onto papers, I used a Warp Transform tool. As you can see, I left some papers unlit for a more randomized, thus realistic, effect.


After cleaning up the image for any “imperfections” like a bicyclist and pavement signage, I finally built the foundation for deeper light and color enhancements that can work wonders in turning an epic fail to epic shot. One of my favorite tools for that is Google Nik’s Viveza. It allows for localized adjustments as seen on the tire, spoiler, pavement under the exhaust pipe, rims, bumper, darker sky and the horizon.
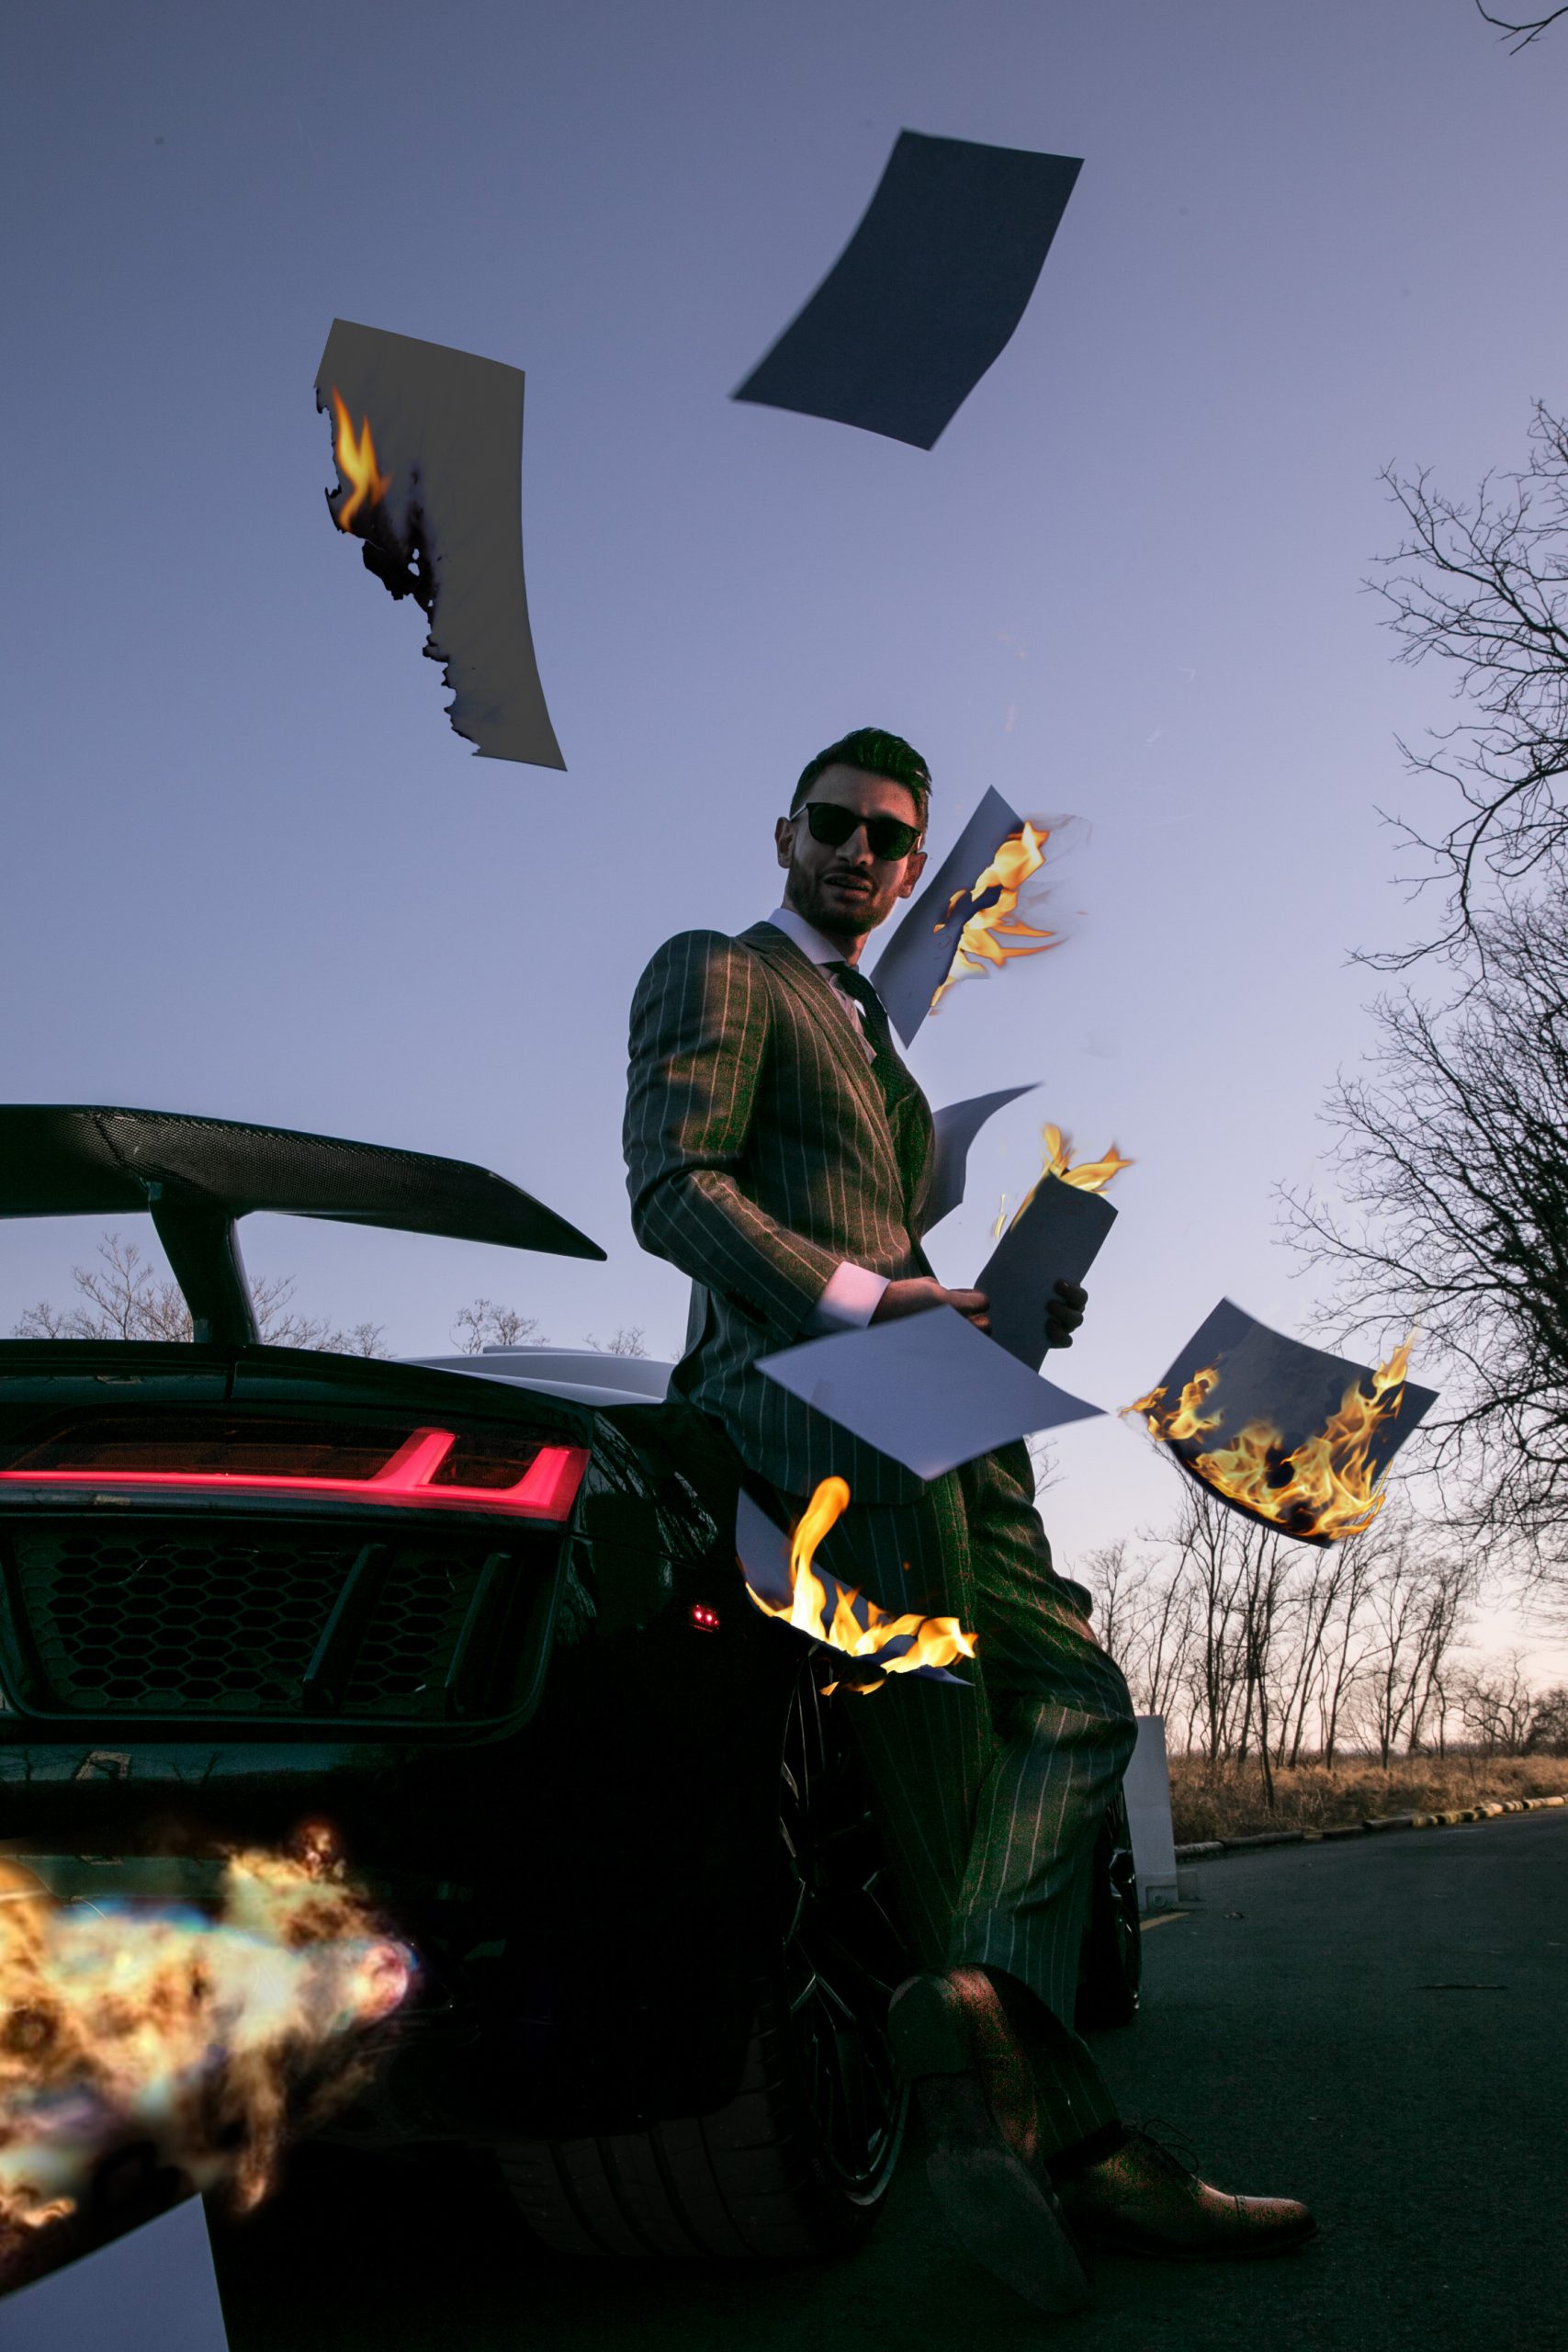

The image almost reached my sought-after condition, ready for the final transformation. I’ve thought of two extra epic touches: smoke and ashes. Back to stock image search. Resized and masked them out to align the elements strategically. I have something decent already!
Taking a fresh look at it, got a feel of what was missing: an extra boost to local tonality, denoising several areas of the jacket, removing an extra sheet of paper below the exhaust pipe, making the right-most flame more realistic, adding another little flame to one of the larger pieces of ash, and a little reshaping of jacket’s shoulder.


Last Drop
And finally, the finishing touch to this epic fail to epic shot transformation. As with a fair number of my final works in the portfolio, I played with various Exposure filters (formerly known as Alien Skin) to give that movie poster feel, complete with a title that Kevin came up with. A layer mask was still required as I wanted different levels of the filter effects throughout the image.
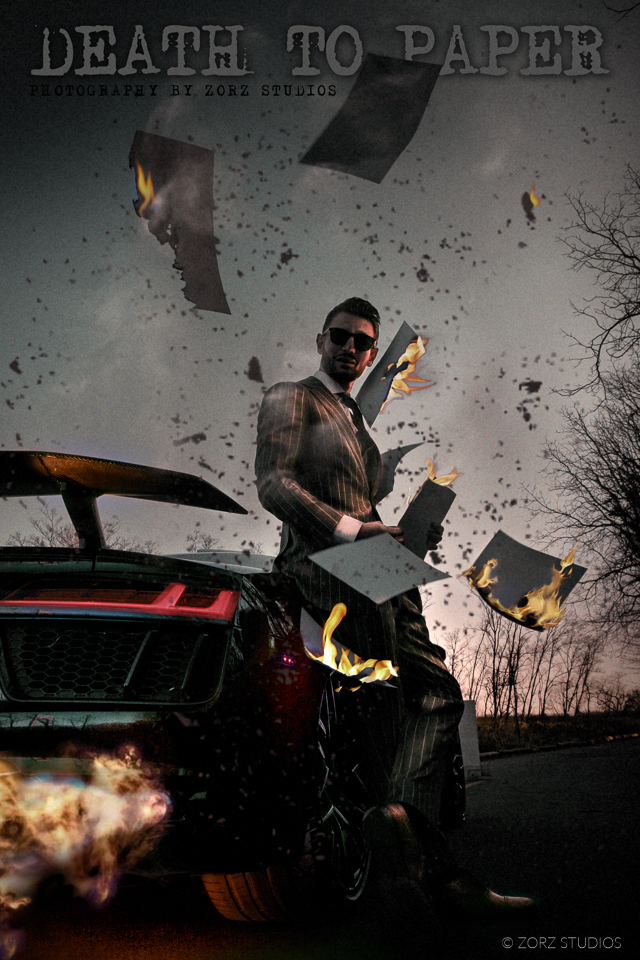
About 12 hours of post-processing on dozens of layers and I end up with a single 456 MB PSD file. This is what I refer to as “Signature processing”, suitable to a select image or two from the entire shoot. The setup got to be right and the budget must be there. This exclusive processing is not included in any packages and is billed separately.
Alternative Image
I mentioned that we rearranged for another setup where we lit the papers on fire. Kevin had an image from that set processed first. Here’s the before and after, using similar techniques. I was waving my papers in front of the camera to get flames and ashes in the foreground and he held his stack:


Final Word
I hope you enjoyed this digital magic walkthrough from an epic fail to epic shot. It is time consuming but so is art I used to do before photography. I’ve always been drawn to fantasy art and hope to keep developing it. If you have a dream concept in mind, talk to me! I will not only shoot it but also bring it to the next level.
To outline every single step of such Photoshop tutorial would create a little opus. I assumed that most photographers would have enough background skills for me to skip some details. If you are a novice and struggle, I can try helping individually. Let me know what you think in the comments below or if you have questions!

