After more than three months of preparation, my first underwater session culminated in a series of marvelous unique images. The image above is just the first edit… There is so much more to come. Curiosity is too high to keep the results for weeks while in processing.
We faced a whole set of unique challenges, absent from the normal photo sessions, starting with special underwater equipment and its usage, to positioning under water, communication, breathing, control of the clothing and hair, make-up application, etc. Just about everything was handled differently.
Be sure to check back as I will add more processed images. Moreover, read the rest of the post for demonstration and explanation of my setup and some behind-the-scene footage. Don’t overlook this unique coverage!
Concept Development
About three months ago, my faithful client Tanya, seen in my previous works Art of Gymnastics and Abandonment, requested a new session revolving around a water theme. She first considered showing off her gymnastic skills on the water surface, possibly with a partner. A lake and a pool were considered, more likely the former since neither of us had own pool. However, cleaner water of a pool quickly fired a daring thought of underwater photo session in my head. I presented the idea to Tanya who, obviously, was shocked and thought of it as too good to become true. The project quickly turned into something more to me than a client’s request. I saw it as a professional challenge which, once conquered, could bring me to the next level of photographic art and skill. I decided to forego short-term profitability and invest into its long-term potential. Invest really big…
Preparations began. The search for a location is covered below as one of the challenges. Tanya and I thought over the wardrobe and decided to limit it to 4-5 changes. I offered my themes and we selected the clothing for them. In the meantime, I was studying the topic of underwater photography and stocking up on the equipment, learning and testing it.
Just a couple of weeks prior to the big day I met a young lady Olga while shooting a wedding. After seeing my work, she got genuinely interested in working with me as assistant and photographer at the weddings. During one of the discussions and learning about her design background, I decided to involve her into this project as well. I quickly called for a meeting with Tanya few days before the underwater photo session and we brain-stormed my existing ideas, adding to and modifying them. And, as another last minute decision, I brought in a make-up artist, Morgan. The day before the shoot, Tanya finalized the arrangements for her partner Daniel who dances with her in a show.
Challenges, Solutions, and Setup
Location. Having my own pool would be a no-brainer. I started to ask around and posted an ad. A commercial location was ruled out due to all the paperwork and limitations. I found several options (and made one remarkable acquaintance in the meantime) and settled for my friend’s pool.
A month prior to the session I attended a 4-day PPNYG’s workshop where I shared my plans with one of the attending photographers David. He became so excited about the project that he graciously offered his pool, surrounded by a beautiful landscape about 50 miles from my studio. Later during the shoot, he continued to marvel us with his hospitality, manners, and kindness.

Photo Equipment. My initial approach was to go modest, as long as I capture Tanya under water. First consideration was to make either my Canon 1D or 5D waterproof. Researching the costs cooled me down for a while. I was willing to go with a smaller, non-DSLR camera for which I could find much less expensive underwater housing. This is how I bought my Canon G9. It does offer many professional capabilities, including manual controls and shooting in RAW format but I felt that the controls and the quality weren’t good enough for my ambitions.
I decided to bite the bullet and go with my 5D and Ikelite housing for it. Seeing all the setups on their website was intimidating. My appreciation goes to their sales rep who answered all my questions during numerous phone calls. Selecting the right accessories wasn’t easy but putting them all together was, thankfully.
I will remember the unnerving moment when I was submerging the whole system underwater, and another one, when I jumped into the pool and intuitively threw my hands with the camera above the water. I certainly have my equipment insured and trust Ikelite’s reputation but there is something about bringing electronics under water…
Well-designed controls on the housing worked perfect during the underwater photo session but poor visibility remained an unsolved problem. Being underwater and constantly moving, I could neither see the exposure indicator in the viewfinder (shot everything in manual mode), nor make a good exposure/focus judgment from the LCD screen. In a way, I was shooting in the dark and hoping for the right settings.
Another limitation was the lens. My housing and the lens dome would not fit any of my lenses, nor other desirable zoom lens. I had to rent a prime (non-zoomable) 35mm lens from Adorama. Shooting with it on the ground would not be a problem if you can step back and forth freely. Not underwater, when you only have seconds to catch the attractive moment (see Moving), frame, compose, adjust, and shoot. I guess that the rock tied to my belt also contributed to my immobility… As a result, many of my shots could not be ideally composed. My 35mm lens made me stay close to the subject and her every move to control her body could easily bring her legs or arms out of the frame.

Lighting. It is quite typical even for professional underwater photographers to use only available light hitting the water from above. While being a nice option, I did not want to limit myself to its direction and other undesirable characteristics. I needed studio light quality and my Hensel studio strobes. Of course, I could not take them underwater but I could trigger them. After long consideration, I decided on getting two waterproof strobes. In one setup, they would both be underwater, a smaller Ikelite 51 attached to the camera housing with a frame, and the bigger Ikelite 125 brought to the side and directed by an assistant for a more dramatic, shape-defining illumination. A 15-foot extension cord ($80 alone!) did the trick. In the other setup, a bigger strobe would serve as a fill on the frame, while the smaller one brought above the water and pointed at my honeycombed studio monolights in the slave mode. With this setup, I could imitate the natural light from above.
Why go for a trouble of replacing sunlight with strobes? Two reasons: 1) control of direction and intensity; 2) sunlight being blocked. Yes, for most of the underwater photo session I blocked the sunlight with a black tent, which I built above the pool to create a clean black background, undisturbed by light reflections off the water surface. I achieved it with two muslin backgrounds – a 9×12-foot hanging from the pool wall and held by the stones, and a 10×24-foot stretched above the pool. The challenge there was that the pool was not rectangular so I had to build a custom frame for the tent. A visit to the Home Depot and consulting with a friendly and helpful associate provided me with necessary materials. You can see the structure on the photo. It is supported by six buckets filled with pebbles. I cut the PVC bars short enough to be stable, yet long enough to fit my Hensel strobes underneath.
Smaller Ikelite 51 served as either fill light, or a trigger so its own 4 levels of power outputs were sufficient. I wanted the bigger Ikelite 125 to be more versatile in output so I bought an EV controller, allowing for 10 output levels. The Hensel lights have 50 output levels. Their modeling lights help with directing the illumination properly, while 10-degree honeycomb rings keep the direction even more controllable.

Make-up. To all the expected requirements of make-up products and application, one essential was added – being waterproof. Here is where Morgan of Jane Doe Make-up shone. Everything, from foundation to lip products, to mascara, to eye shadow and liner was either waterproof, water-resistant, or waterproof-coated. The multi-hour and multi-submerge tests were honorably passed.
Communication and Posing. Coordination and directing proved to be among the most challenging. When I shoot on the ground, I am particularly involved in directing and posing the model, watching out for tiny details and angles. I can see how every inch, a slight shift of a chin can make a difference on overall impact. Those who saw me working know how much time I take to search for the right pose. Very often, I demonstrate the pose myself to a model. It is this direct communication with the subject that helps me achieve what I seek.

Practically all the luxury of relaying my directions sank eight feet on that day. Having both hands holding the housing and trying to keep it steady prevented me from making any signs to the model, let alone talking to her. Keeping her eyes open was already challenging, much less trying to see my gestures. I didn’t go to the surface as much as Tanya (more on this in a moment) and when I did, both were catching our breath, making funny noises, and struggling to float. Tanya wasn’t too comfortable under water and it was difficult for her to comprehend my comments as easily as on the ground.
Even when everything was clear and we went back down, proper posing was only half of the deal. A half of the effort was put into mere staying under water and struggling with physics affecting the less-controllable body movement.
Moving. To add to the above-mentioned, controlling the hair and clothing was also a challenge. Some shots had to be retaken because of improper and unflattering flow. And when I say “retaken”, I mean more than pressing the button the next second. It could be 10 minutes later, which resulted in a very slow progress overall.
While Tanya worked on posing, I stood on the floor of the 8-foot deep pool. A rock placed in a canvas bag and tied to my belt held me there steadily. I could swim up with some effort, though.
Breathing. I used to do swimming for 5 years and can hold my breath for up to 2 minutes, as opposed to Tanya’s 20 seconds on average. She also needed a break between the dives We still managed to shoot up to 3 dives with me standing at the bottom, but only about 2-3 shots per each dive – the strobes were taking time to recycle and I also waited for a better pose.
Analyzing. Although mentioned before, I’ll just state that it wasn’t until I got to my studio computer when I was able to see any missed focusing or blown-out highlights, for example. They were just impossible to analyze well during the shoot, leaving some room for a repetitive error in settings. Since I shot in RAW format, I can alleviate some of them.
What a long story it become… Yet, I have a feeling that I didn’t cover everything that I thought of, prepared, did, experienced, and overcame. In the end, I am sure of one thing – all the trouble and investment was worth it. I got my client ecstatic and added a unique page to my portfolio, while collaborating with new friends and just having a pool of fun!
Thank you for your time. Feel free to ask me questions – I’ll be happy to share my knowledge and experience. Don’t forget to come back in September to see new images from this underwater photo session – there will be so much more to enjoy!
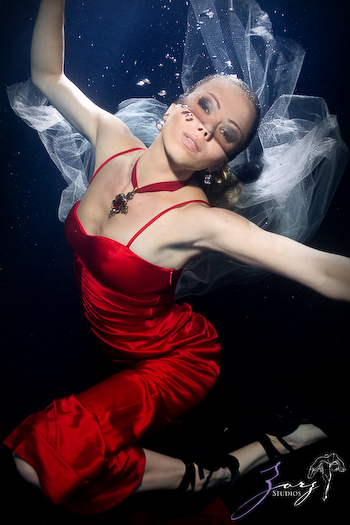
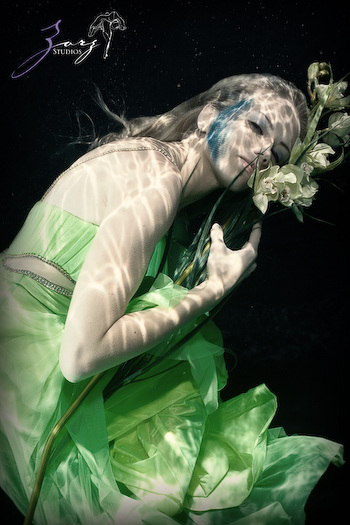
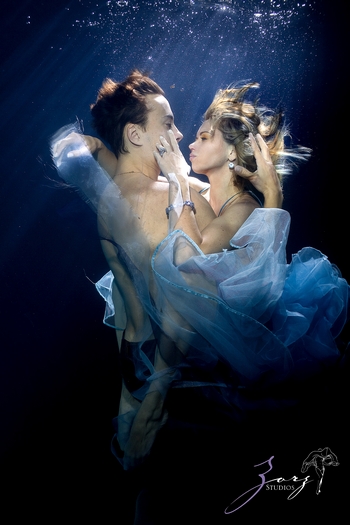
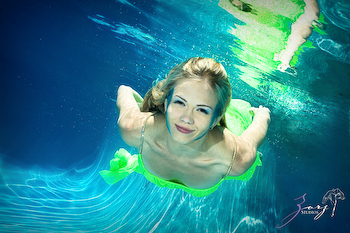
UPDATE 12/12/2008: After a long wait, the entire album has been published on Zorz Studios’ website. Here are some of the images:


The Crew
Photography, Lighting, and Concept: Ed Hafizov
Photographer’s Assistant and Stylist: Olga Mironova
Make-up Artist: Morgan Wells
Models: Tanya, Daniel
Host: David Klein
Equipment
Canon 5D SLR with 35mm f/1.4 L
Canon 1D SLR with 24-70mm f/2.8 L
Ikelite DSLR Housing
Ikelite Substrobes 51 and 125
Hensel Integra Monolights





28 Comments
Fantastic image! Can’t wait to see what you have discovered and how you addressed the challenges!
Oh my God, finally! You dreamt big and you’ve accomplished it! I am sure you will top yourself with this project Looks unbelievably unusual and so good! Can’t wait!
Hi Ed.
It was a pleasure working with you the other day. I look forward to seeing the images from you. You are extremely talented. I would love to work with you again! Thank you for this opportunity. Please fill me in on any other shoots you may have.
Thank you.
-Morgan
Ed, you never cease to amaze. This first edit is stunning and I am sure we will be blown away with the final image.
I will be trying an underwater ‘trash the dress’ in late sept. I hope I can pick up some tips from this..
The entire concept is unique and exciting. This intial image is one that just baffled me in terms of setup and execution. It sure is a long way away from typical underwater OR fashion images.. a unique blending of 2 styles of photography! Cudo’s to you, the model and the entire crew who assisted in bringing this off!
Dan
Ed,
..’nice work’, unique, You have pulled this off brilliantly, which is typical of you anyway !
I look forward to enjoying more of this.
Geof
I could not believe my eyes! really…
can’t wait to see more images. Very unique and fascinating… I wonder how the idea was born and what prompted it.
Amazing!
omg, you have got to be kidding me. You’re awesome!!!
Damn, Ed, I LOVE SCUBA and I’m seriously jealous now that you combined two of my favorite things into one brain-bending day.
Way to STRETCH your abilities, man. I’m really proud of ya!
I think this may be one of the first longer blogs that I’ve actually read completely instead of just skimmed…this is so amazing!
Greetings!
I totally know where you have come from and the joy of the experience you had learning to make it a studio setting above the surface of the water. Please feel free to see my underwater images that I have done. MY inspiration for this was Howard Schatz. HE had a wonderful book called “Pool Light” that was my inspiration.
I am looking forward to seeing your wonderful images!
Warmest Wishes,
Elena
Wow Ed! You’re amazing. This is just fantastic!
Ed,
I simply cannot wait to see the entire series. What a challenge, but I’m sure the payoff will be well worth it.
I am so glad everything worked out for you. The photos are beautiful!!!!
Ed, you are such a talent! As a fellow photographer I instantly understood your desire to do this and do it the right way. How cool! I’ve seen this kind of photography before but never understood what it took to get it done. Your article was wonderful to read and I learned enough that I feel I could attempt it one dayif I so desired. The results still require the guidance of a professional photographer but a little luck sounds like it helps too! You just added one more reason why you’re one of my favorite artists. Bravo!
Mark
You are not just an amazing artist.. Your talent is so rare and so inimitable and you are rising so quick that there will be no barriers for you to become an internationally recognizable star..
Very well done Ed!
Arti
Hi Ed!
It looks like you’re keeping busy. You have beautiful work and it was a pleasure to work with you for the underwater shoot. I love the pictures that I have seen so far and I look forward to seeing more. If you ever need a makeup artist for any other shoots or jobs, please let me know.
Your work is inspirational and I would recommend you to any one who is getting married, doing a fashion shoot, or any thing else.
Thank you!
I`ve come here via film then the last 12 months aquireing digi cameras fujis for sensor and nikon compatability and then fotki the last 3 months
….You shareing this is really good of you…
I am fascinated by the image capture much more than the “dark room” type creativity …
So good of you to share
Thank you…
Richard
I keep coming back here and every time I have just one thing to say:
“You are f***ing incredible with your photography!..”
Now you can delete it. 🙂
Arti
(Most exciting folio of the year!)
When in my travels I visit the great Cathedrals my first response is the sheer joy of experiencing the beauty of the incredible interiors and facades. My next response is a feeling of respect for the artists who designed the various pieces of the project, and for the “engineers” and tradesmen who DARED to bring the design to completion. Many times the designer (architect) paid no attention to the fact that the project was near impossible, or at least impossible to do well. The builders then forged the tools and talents to implement the “impossible”.
So, Ed…. thanks for designing, and daring, and doing this wonderful piece of work. While the rest of us take our little steps..YOU FLY!
JOEL
hey Ed.
Your work is totally amazing.
Those images are awasome.
congrats and much success to you.
-JP
Ed, finally found time to read your blog and view the finished album. As ever, I am stunned by your vision, technical expertise and willingness to go the extra mile to get the results that you want. I agree with Arti above, if you keep up this standard of work and attention to detail it will not be long before you are internationally recognized and sought after. When that happens I, for one, will be proud to say that you gave me advice and inspiration.
Ken
Privet,
I have been following your new work threw newsletters and every time I look it is impressive.
Great job. Wish you the best,
Happy new years send my love to Nadia, and your little princes.
Veronika
Ed, You did a great job at Iwona and Lukasz wedding! The pictures are awesome. Wish You good luck.
Michal
Hello,
I am experimenting with underwater fashion photography in Australia. I saw your photos and they are impressive. How did you achieve the “shafts of light” in some of your images? And did you shoot TTL or Manual?
Shay.
Shay,
Here’s how I achieved the effect of “shafts of light”. Used dark (black) background, built light-blocking fabric roof over the water (pool) to exclude any interfering light, then mounted a controllable light source (monolight on a stand). Importantly, that light source had a honeycomb grid on it, and this is what provided the directional light. Everything else that I mentioned accentuated it.
I almost always shoot Manual and to me, it was a must underwater.
Hope this helps.
Ed
Hi Ed,
I just bumped into your site…
I’ve been doing underwater photography for a few years as well and have been through all the same obstacles you have described. I really enjoyed reading your telling of your experience.
Nice work!
Cheers,
Roberto
Hi Ed,
I am not a photographer. I came across your site from frequent browsing of wedding photographers. And even if I had booked one, it did not stop me from trying to find the best photographers! I saw your work… You are such a gem who’s not afraid of trying out something new. I love the art, passion, the emotions being expressed in the pictures, the delicate flow of fabrics. If I have the chance, I wanted to try underwater photoshoot as well. I would then be a happy soul.